**A draft post I found from about a year ago.**
Remember how I always talk about eating locally? It's usually how I explain my travel exception from being vegetarian. (It's also how I attempt to defuse the tension when someone offers me a piece of chicken, and I explain that I don't eat meat, and they start apologizing profusely. Why do they do this? They were being nice, and offering me food...).
Now, it is time for me to eat my words. Literally. (Ho ho ho...aaaand that's a groaner. Sorry.) My CSA from Rocklands Farm has begun! I'm excited to incorporate more of what is local and seasonal into my diet, and see where it takes me. I used to spend hours looking at recipes, and then just buying whatever I needed from the co-op, if the fruit stand or the farmers' market didn't have all the ingredients. It's still a little frightening to jump out and run with my own inspiration (how do I know it will be good if a famous food blogger hasn't vetted it?), but with work, hours of recipe meditation are not in the cards. Now, I just have to show up in the kitchen and see what happens (and it really hasn't been a challenge so far- greens, gorgeous greens, more eggs than I know what to do with, and a few other odds and ends like thyme and broccoli rabe).
Eating local (or trying - who knows where those mung beans came from) and the chance to meet David Lebovitz!!! led me away from de-stingering nettles to the Dupont Circle Farmers' Market. While working up the courage to go up and talk to the man, I toured the market several times, and ended up with goat cheese (two kinds, I know), fingerling sweet potatoes, Fuji and Gold Rush apples, midnight and golden beets, and a giant bag of sweet, young carrots. It was hard to resist the ciders, the yogurts, the pickles, the heads of lettuce, the rhubarb... You have a CSA, Kemper!
Last night, I made a 101 Cookbooks-esque meal of French green lentils, shredded radish, carrots, arugula, cotija, a wine-poached egg, and some greens I don't even know the name of. Let's see where tonight takes me.
Tuesday, May 5, 2015

Baying Hound Brewery
Rockville, my current city, suffers from what a former roommate called "Instant Life". The city center was inflated overnight, snapped into place, and is ready with its veneer of character for People! Bustle! Business! It looks as if it could be interesting -- and I do love the library -- but somehow my eyes just pass over it without stopping. Nothing pulls me in.
There are many good things about the city center, and other developments like it. Rockville Town Center is walkable, close to the metro, it has a market (albeit an exceedingly pricey one) and a library and clothing shops and restaurants... I can't judge it too harshly, but it fails to inspire.
Character overfloweth, however, on the other side of the Rockville Pike, at the Baying Hound Brewery. It sits amid autobody shops and storage sheds, and looks mostly like your friend's garage who happens to make (a lot of) beer. A current roommate and I walked over after dinner, and each ordered a flight.
The six-beer flight included:
On the other hand, that is in a way part of the charm of the place. The bartender wears dragon rings, the TV runs through a series of local trivia questions, there's a popcorn machine, and Celtic punk plays in the background. The crowd is small, but solid -- other citizens interested in exploring the successes (and failures) of the slow, organic growth on the other side of the Rockville Pike.
There are many good things about the city center, and other developments like it. Rockville Town Center is walkable, close to the metro, it has a market (albeit an exceedingly pricey one) and a library and clothing shops and restaurants... I can't judge it too harshly, but it fails to inspire.
Character overfloweth, however, on the other side of the Rockville Pike, at the Baying Hound Brewery. It sits amid autobody shops and storage sheds, and looks mostly like your friend's garage who happens to make (a lot of) beer. A current roommate and I walked over after dinner, and each ordered a flight.
The six-beer flight included:
- Darwin: a sour beer -- or, American Wild Ale, as they called it -- pretty decent, not eye-openingly sour, rather fruity in fact. Almost like a mix between a saison and a sour.
- Dog Breath: technically a malt liquor (no hops at all) that they infused with wormwood. Medicinal was the best you could say about it. The man behind the counter said, "It's the least bad it's been," -- it seems it started out undrinkable.
- Dog Park: an IPA. Not bad, I probably wouldn't go out and purchase a six-pack, but then a California girl is picky about her hops.
- Hrotgarmr: a Viking ale (that is, as close as modern health codes allow them to get to a Viking ale)
- Lord Wimsey Pale Ale: I enjoyed this one. Flowery, light, drinkable.
- Originators Belgian: My favorite by far. Very drinkable, especially on a warm spring evening.
On the other hand, that is in a way part of the charm of the place. The bartender wears dragon rings, the TV runs through a series of local trivia questions, there's a popcorn machine, and Celtic punk plays in the background. The crowd is small, but solid -- other citizens interested in exploring the successes (and failures) of the slow, organic growth on the other side of the Rockville Pike.
Thursday, April 17, 2014
A Visit to Providence and a Banana Caramel Cake
Providence is not the first place I would think to visit, but given the opportunity to travel, I'll go pretty much anywhere - and a week ago, I found myself on board a train heading north. I brought an extensive picnic to accompany my journey (and as a result, ended up lugging a tote full of glass tupperware around New England with me) - Moroccan carrot salad (note: while long ribbons of carrot are attractive, grating works much better to soak up the sauce in this recipe), Reinhardt's whole-wheat pita, roasted beets, radishes, and a small, crunchy Persian cucumber. The glass containers slid around the tray, and crumbs went all over my lap, but I am certain that my seat-mate was looking on in Great Envy.


Providence is red brick and walkways along the canal and a thousand churches and wood-paneled houses turned into Moroccan tea houses and "snuggeries." It also has a one-way street called Friendship and is apparently run by the mob, but I didn't find either of these things. I did, however, find a human in a bear suit playing a keytar:

Providence was quiet. The streets seemed empty, in a way that made me think that there was some big event somewhere, and if I just went around the right corner, I'd find it. I didn't, but I found a lot of over things, and upon my return, I found myself with three very ripe bananas.
I suppose I could have made banana bread, but I was looking for something new, and I spent much of the afternoon wandering through various banana-y scenarios. I decided to make something sweet and soft, with caramel and nuts for color and depth, and a bundt pan to dress it all up. It would make a lovely tea-cake, and the leftover caramel would be amazing over ice-cream.

Banana Walnut Caramel Cake:
For the Cake: (adapted from Orangette)
Ingredients:
1 1/2 sticks unsalted butter, room temperature
1 cup + 2 Tbl packed light brown sugar
2 1/4 cups all-purpose flour
2 1/4 tsp baking powder
3/4 tsp baking soda
3/4 tsp salt
2 large eggs
3 large ripe bananes, purées
3/8 cup sour cream
1/2 tsp vanilla extract
1 1/2 cup walnuts, divided
zest of 1 orange
Directions:
Preheat the oven to 350F.
Cream butter and sugar in a stand mixer on high speed until pale and fluffy. While you're waiting, whisk together the flour, baking powder, baking soda, and salt in a bowl. Also, chop 1 cup of the walnuts very fine, and chop the remaining 1/2 cup into attractively small pieces (these will top the cake. Butter and flour your favorite bundt pan, and scatter the coarser walnuts at the bottom.
Add the eggs to the butter-sugar mix, beating thoroughly after each addition. Add the bananas, beat thoroughly, and finally add the sour cream, vanilla, and orange zest, and beat until combined. Add the flour, mixing slowly until almost combined, then add the finely-chopped walnuts and finish mixing by folding with a rubber scraper.
Pour some batter into the bundt pan, then pour some caramel (recipe below) on top. Cover with more batter, then more caramel, then finish with batter. (To be honest, I only managed one layer of caramel.)
Bake 30-40 minutes, or until a toothpick comes out clean, but with a few crumbs still clinging to it. Let the cake cool on a rack for 10-15 minutes, then invert onto a plate. Serve with more caramel sauce.
For the Orange-Caramel Sauce (adapted from this recipe):
Ingredients:
1 cup turbinado
2 Tbs strained, fresh-squeezed orange juice (from the orange you just zested)
4 Tbs unsalted butter (use the good stuff)
1/2 cup sour cream
1/2 tsp sea salt
Directions:
In a large saucepan, mix the juice and the sugar. On the very lowest of heats, melt the sugar, stirring as little as you can possibly manage with a rubber scraper. (Restrain yourself! And read this.)
When the sugar has melted, bring it to a boil, and let boil for 3 minutes, or until it is a gorgeous golden brown. Add the butter to stop the cooking, and stir continuously until the butter is melted and incorporated. Remove from heat, and add the sour cream and sea salt. Stir to combine. Pour into a clean pint jar.

Wednesday, March 26, 2014
A Beginning.
It starts here.


And then we put in a lot of this.


...to this...

...to this...

And then we do a little of this.
And then we put in a lot of this.
And then we let it sit for hours, on the lowest of low heat. We go from this:
...to this...
...to this...
...to about a quart of beautiful, pale, not-quite-but-almost meltingly tender cabbage, of which I failed to take a picture. The next day (if you are like me, and don't quite have time on a Monday night to make this all happen at once), put your cabbage in a pot with stock, and bring to a boil. Add a can or two of beans, a couple tablespoons of butter, a good handful of parmesan, generous amounts of salt and pepper, and let it all heat and mingle. When everything is thoroughly bubbly and warm and you're so, so hungry that you can't wait to take a picture (and really, that steam obscures everything), serve in a warmed bowl with more parmesan. It's rich and filling without making you feel heavy, and sends rivers of warmth to the tips of your toes.
I almost don't want to write anything more: the recipe is beautiful and perfect in its simplicity. Plus, you have cabbage to start chopping.
Smothered Cabbage Stew:
Adapted from Orangette
Smothered Cabbage:
Ingredients:
1 large yellow onion, chopped
1/2 cup olive oil
4 cloves of garlic, chopped
1 medium head of Savoy cabbage (about 2 lbs.)
salt
freshly ground pepper
1 Tbl white wine vinegar
Directions:
Heat the olive oil in a large, thick-bottomed soup-pot or Dutch oven (my preference) over medium heat. Add the onion, and cook, stirring every once in a while, until the onions are golden (five minutes, perhaps). Add the garlic, and cook, stirring off and on, until the garlic smells fragrant (a few more minutes).
In the meantime, quarter the cabbage, core it, and slice it into long, thin slivers, making sure to break up any large pieces that may have escaped your knife (or do this before you start). When the garlic is finished, add the cabbage to the pot, and stir to coat the cabbage in the oil. (I sent little pieces of cabbage flying frequently, so really, use a big pot.) Continue to cook and stir until the cabbage is fairly wilted, then add a good amount of salt and pepper, and the vinegar. Stir to combine, then cover, and let sit for 1.5-2 hours on the lowest possible setting. Stir the cabbage occasionally, and add a tablespoon or two of water if it looks too dry. When the cabbage is done, you can proceed to the next recipe, or freeze it for another day.
Stew:
Ingredients:
1 recipe of smothered cabbage
3 cups of vegetable stock
28-oz cooked beans (I used garbanzos and great Northern beans)
2 Tbl butter
1/3 cup grated parmesan
salt and pepper
more parmesan to serve
Directions:
About as easy as it gets. Add the cabbage to a large pot and pour the vegetable stock over it. Bring to a boil, then turn down to a simmer. Add the beans, and stir to distribute. Add the parmesan and the butter, and turn the heat to medium-high until the soup starts bubbling again. Add salt and freshly ground pepper to taste, and serve with more parmesan.
Bliss.
...now that your tummies are full, and small smiles of contentment linger on your faces, I thought to have a long, thoughtful, after-dinner chat. But I find that the writing has settled my stormy thoughts, the soup came back in spirit to tell me that everything's all right. Or even if it's not, I've got soup in my bowl, and that's a pretty good start.
Wednesday, March 19, 2014
Shaker Lemon Pi(e)
I've been putting this off, mainly because I lacked an insightful or funny introduction. Don't worry, I still haven't thought of one, but that's all right. Even being homebound on the snow day (they've all been on Mondays - very convenient) did not give inspiration for this (even though I wrote pages elsewhere). So, this post is just about pie. In honor of Pi Day (of course), I made a Lemon Shaker Pie.

It is a perfect pie for winter, when citrus is abundant and cheap, and the ingredients are probably already in your pantry, so you don't have to wander out into the worst of all weathers, the Wintery Mix.

This particular recipe comes from both Tartine and Smitten Kitchen (who got it from Saveur, I believe - let's see how long we can make this chain), and was apparently a recipe originally created by the Shakers, who were apparently rather innovative bakers. This lemon pie is a testament to their frugality: you use the entire lemon (excepting seeds and stem) in the filling, which becomes a lightly custardy lemon marmalade that just sings with bright lemon flavor. I recommend small slices, and something creamy beside it, to balance the flavor - vanilla or crème fraîche ice cream, perhaps?
Lemon Shaker Pie
Adapted from Smitten Kitchen and Tartine
Ingredients
Filling:
2 large (1/2 lb) lemons (Meyers are lovely, but any relatively thin-skinned lemon will do)
2 cups (14 oz) sugar
1/4 tsp salt
4 large eggs
Egg Wash:
1 large egg yolk
1 Tbsp heavy cream
Crust:
1 tsp salt
2/3 water, very cold
3 cups + 2 Tbsp (1 lb) AP flour
1 cup + 5 Tbsp (10 1/2 oz) unsalted butter
Directions
Twenty-four hours (this is Important, you cannot skip this) before you want to bake this, prepare the lemons. Zest the lemons into a non-reactive bowl. Cut the lemons in half, and trim the ends, down to where the fruit starts. Lay the lemons on their flat surfaces, and slice them as thin as you possibly can - paper thin - discarding any seeds you come across. If the lemons are cold, they'll be easier to slice. Add the lemons to the bowl with the zest, and add the sugar. Toss so that the lemons and sugar are fairly evenly distributed, then cover the bowl and let sit for 24 hours.

In the meantime, prepare the tart dough. Mix the flour and the salt in a mixing bowl, and cut the butter into large-ish pieces into the flour. Using a pastry knife or two forks or whatever your preferred tools are, cut the butter with the flour until the butter is the size of large peas. Drizzle the water into the bowl and toss with a fork until the dough comes together into a shaggy mass. Put the dough onto a lightly floured work surface, and divide it into two pieces. The idea is to work the dough as little as possible, and to keep the butter pieces as large as possible. That being said, form the dough into two disks, about 1 inch thick, and refrigerate for at least two hours.
The next day, discard any seeds that may have floated to the surface of the lemon-sugar mixture. Beat the eggs with the 1/4 tsp salt, then add the egg mix to the lemons and sugar, mixing well.
Roll out the dough into two 12-inch wide, about 1/8-inch thick disks, and use one disk to line a 9-inch tart pan, trimming to leave about 1/2-inch of overhang. Pour the filling into the shell, and cover with the second disk. Trim and crimp the edges. Mix the egg yolk and the cream, and brush over the surface. If you like, you can sprinkle some coarse sugar over the top. Refrigerate for 30 minutes while the oven preheats to 350F. Just before baking, cut a few slits (or if you're me, 'pi') into the top to allow air to vent. Bake 40 minutes to 1 hour (Tartine says 40min, mine took much longer) until the crust is golden and the pie is bubbling through the slits. If the pie is getting too brown too quickly, you can cover it with foil.
Let cool, and enjoy!

Lemon Shaker Pie
Adapted from Smitten Kitchen and Tartine
Ingredients
Filling:
2 large (1/2 lb) lemons (Meyers are lovely, but any relatively thin-skinned lemon will do)
2 cups (14 oz) sugar
1/4 tsp salt
4 large eggs
Egg Wash:
1 large egg yolk
1 Tbsp heavy cream
Crust:
1 tsp salt
2/3 water, very cold
3 cups + 2 Tbsp (1 lb) AP flour
1 cup + 5 Tbsp (10 1/2 oz) unsalted butter
Directions
Twenty-four hours (this is Important, you cannot skip this) before you want to bake this, prepare the lemons. Zest the lemons into a non-reactive bowl. Cut the lemons in half, and trim the ends, down to where the fruit starts. Lay the lemons on their flat surfaces, and slice them as thin as you possibly can - paper thin - discarding any seeds you come across. If the lemons are cold, they'll be easier to slice. Add the lemons to the bowl with the zest, and add the sugar. Toss so that the lemons and sugar are fairly evenly distributed, then cover the bowl and let sit for 24 hours.
In the meantime, prepare the tart dough. Mix the flour and the salt in a mixing bowl, and cut the butter into large-ish pieces into the flour. Using a pastry knife or two forks or whatever your preferred tools are, cut the butter with the flour until the butter is the size of large peas. Drizzle the water into the bowl and toss with a fork until the dough comes together into a shaggy mass. Put the dough onto a lightly floured work surface, and divide it into two pieces. The idea is to work the dough as little as possible, and to keep the butter pieces as large as possible. That being said, form the dough into two disks, about 1 inch thick, and refrigerate for at least two hours.
The next day, discard any seeds that may have floated to the surface of the lemon-sugar mixture. Beat the eggs with the 1/4 tsp salt, then add the egg mix to the lemons and sugar, mixing well.
Roll out the dough into two 12-inch wide, about 1/8-inch thick disks, and use one disk to line a 9-inch tart pan, trimming to leave about 1/2-inch of overhang. Pour the filling into the shell, and cover with the second disk. Trim and crimp the edges. Mix the egg yolk and the cream, and brush over the surface. If you like, you can sprinkle some coarse sugar over the top. Refrigerate for 30 minutes while the oven preheats to 350F. Just before baking, cut a few slits (or if you're me, 'pi') into the top to allow air to vent. Bake 40 minutes to 1 hour (Tartine says 40min, mine took much longer) until the crust is golden and the pie is bubbling through the slits. If the pie is getting too brown too quickly, you can cover it with foil.
Let cool, and enjoy!
Monday, March 3, 2014
Back!
...and checking in from Rockville, Maryland, where I am snowed in (wait, isn't it March?) and taking the opportunity to return to this long-neglected project.


 |
| My Rockville backyard. |
There have been many changes behind the scenes - I finished the PhD and got a job on the other side of the country, and in between walked the Camino, worked on a farm in Bavaria, rode a camel in the Sahara, and much, much more, stories from which will certainly pepper this blog in the months to come.
 |
| Get it? Pepper? |
Changes in my schedule and environment have led to changes in how and when and what I cook. There have been new challenges (as well as numerous realizations of how spoiled I was in California - why would one live anywhere else?), but there have been new projects and goals, some of which have even succeeded. Expect posts about bread, CSAs, and cooking with unusual (to me) Asian vegetables.
One of the big changes about the East Coast is the access to and price of produce. I have mixed feelings about doing all my shopping at Lotte and H-Mart (fresh okra? now?), but when cilantro costs three dollars a bunch elsewhere, most misgivings seem to evaporate. However, when I can cook something with ingredients that are dried, canned, or (mostly) in season, I jump on it.
If you aren't already reading 101 Cookbooks, go there now. Heidi Swanson's recipes are fresh and beautifully photographed, and she has a knack for combining flavors and ingredients that challenge my conceptions of what "goes together," and always carries it off with style. (Guilty: I tend to be a little conservative when spicing, unless following a recipe.) The following was adapted from her recipe. My version omits the mint (which I thought was buried by the other flavors), and has a chili-like consistency, perfect for the snowy days. I topped it with cotija, cilantro, green onions and freshly-squeezed lime juice, and ate it with toasted, thick corn tortillas, though I bet it would be delicious served over polenta.
Dried Fava Bean Stew with New Mexico Chiles
Adapted from 101 Cookbooks
Ingredients:
1 lb/ 16 oz/ 450 g hulled dry fava beans*
8 cups/ 2 L vegetable broth (I used this)
8 garlic cloves, unpeeled
1 large white onion, sliced 1/2-inch/ 1 cm thick
1 28-oz can diced tomatoes
8 dried New Mexico chiles, (some spicy, some medium, depending on your preference), stemmed and seeded, divided
2 Tbl extra virgin olive oil
2 Tbl cider vinegar
3/4 tsp dried Mexican oregano
1 1/2 tsp fine-grain sea salt
Toppings: cotija (or other fresh, crumbly Mexican or Latin American cheese), cilantro, green onions, lime
Directions:
Place the fava beans in a large pot with the broth and three of the New Mexico chiles. Bring to a boil, and simmer the mixture for an hour, or until the beans are tender, but not falling apart.
While the beans are cooking, put the garlic and onions on a baking sheet, and broil 5-10 minutes, about 4 inches from the broiler (this number is highly dependent on your oven. Always watch broiling items like a hawk!), until the onion is browned and carmelized.

 Remove the onions and garlic, and let them cool. Once cool (or cool enough to handle comfortably), peel the garlic, and dice the onions and garlic together. Whenever they're done, add the onions, garlic, and tomatoes to the beans, and let it continue to simmer. Like all chilis, it benefits from cooking slowly over a long period of time, so don't rush it.
Take the remaining chiles, and somehow reduce them to tiny pieces. (I used scissors, but this was painfully slow. In the future, I would put it through a food processor.) Heat the oil in a frying pan over medium heat, and add the confettied chiles. Cook for a minute, stirring (do not leave them, or they will burn), then remove and add 3 tablespoons of water, and the vinegar, oregano, and 1/2 teaspoon of the salt. Set aside, and let sit for at least 30 minutes, stirring occasionally. Add to the pot with the beans.
When the beans are tender, and you just can't standing waiting any longer, salt the stew to taste (though be aware that the cheese is salty), and serve with all your favorite fixings: cotija, chopped cilantro and green onions, lime juice... Enjoy!
*Note: Make sure your fava beans are hulled, or hull them before starting! I did not, and found myself hulling a pound of hot fava beans halfway through cooking. I cannot recommend this procedure to anyone.
Wednesday, June 20, 2012
Granola
I grew up on TJs ginger-almond granola (which I thought was pretty tasty at the time, granted), but was converted by a fellow from Eugene's The Lorax, who was visiting Berkeley and Lothlorien for a few days. I have never eaten so much granola in my life as that week.

It took me a while to attempt it myself, but now that I have, there is No Going Back. Fortunately (as the internet and most likely you have already realized), it's really pretty easy and tastes about a thousand times better than much of the stuff on the market.
Technically, the word I wrote down at the top of this recipe is "granaloa," which says something about the hour and/or mindset I was in at the time of recording. I found it on the internet somewhere I am unable to recall (apologies to the since-forgotten blogger), and have adapted it as I like. Have fun!


It took me a while to attempt it myself, but now that I have, there is No Going Back. Fortunately (as the internet and most likely you have already realized), it's really pretty easy and tastes about a thousand times better than much of the stuff on the market.
Technically, the word I wrote down at the top of this recipe is "granaloa," which says something about the hour and/or mindset I was in at the time of recording. I found it on the internet somewhere I am unable to recall (apologies to the since-forgotten blogger), and have adapted it as I like. Have fun!

Saturday, June 9, 2012
Black Bean Salad with a Side of Orange and Jicima
The summer salad series continues with both alliterations and recipes. These next two I thought wonderful served together, the spicy heartiness of the black beans complemented by the sweet, brisk refreshment of oranges, jicima, and radishes. Both of the recipes come from Annie Somerville's Fields of Greens (which, by now, you have probably realized I am obsessed with). For the bean salad, the changes I've made reflect concessions to cost and convenience, and for the orange salad, changes reflect misreading the recipe, but liking the final result.

Spicy Black Beans with Chilies and Lime
Adapted from Fields of Greens by Annie Somerville
Serves 4-6.

Ingredients:
2 19-oz cans of black beans, drained and rinsed*
Salt and pepper
1/2 medium-size carrot, diced (about 1/4 cup, prepped)
1/2 celery rib, diced (about 1/4 cup, prepped)
1/3 red bell pepper, diced (about 1/4 cup, prepped)
Zest of 2 limes (about 1 1/2 tsp)
3 Tbl fresh lime juice (the juice of the two you zested should be enough)
2 Tbl Champagne vinegar**
1 garlic clove, minced
3 pinches of cayenne
1/4 cup olive oil
1 or 2 jalapeno chilies, seeded and diced
2 heaping Tbl chopped cilantro
1 Tbl chopped mint (optional)
Directions:
Put the (rinsed, drained) beans into a large bowl. Bring a small pot of water with 1/2 tsp salt to a boil. Add the carrot, cook for 30 seconds, then add the celery and cook for another 30 seconds. Drain, rinse with cold water, and add to the beans. Add the bell pepper to the beans.

To make the dressing, combine the zest, lime juice, vinegar, garlic, 1 tsp salt, and 1/4 tsp black pepper in a jar, and shake to combine (or whisk them together in a bowl). Add the olive oil, and shake again. Add the dressing and the jalapenos to the salad (the salad should be spicy, but if you're worried, add half the jalapeno, taste, and add more as desired).
Let the salad marinate for at least 30 minutes. Add the cilantro and mint before serving.
Serving Suggestions: Cotija (or Queso Fresco, or Mexican cheese) is pretty widely available these days, and pretty delicious sprinkled on top. Quick pickled onions could be good, and I know the orange-jicima salad is!
*Note: The original recipe calls for 1.5 cups (9oz) of dried black beans, sorted and soaked overnight. Drain and rinse the beans, put them in a large saucepan, cover with cold water, bring to a boil, and then cook at a gentle boil 20-25 minutes (until tender but not falling apart). When the beans are done, proceed with the recipe as written.
**Note: If you can find Champagne vinegar for cheap, that's fine. Otherwise, just use sherry vinegar.

Spicy Black Beans with Chilies and Lime
Adapted from Fields of Greens by Annie Somerville
Serves 4-6.

Ingredients:
2 19-oz cans of black beans, drained and rinsed*
Salt and pepper
1/2 medium-size carrot, diced (about 1/4 cup, prepped)
1/2 celery rib, diced (about 1/4 cup, prepped)
1/3 red bell pepper, diced (about 1/4 cup, prepped)
Zest of 2 limes (about 1 1/2 tsp)
3 Tbl fresh lime juice (the juice of the two you zested should be enough)
2 Tbl Champagne vinegar**
1 garlic clove, minced
3 pinches of cayenne
1/4 cup olive oil
1 or 2 jalapeno chilies, seeded and diced
2 heaping Tbl chopped cilantro
1 Tbl chopped mint (optional)
Directions:
Put the (rinsed, drained) beans into a large bowl. Bring a small pot of water with 1/2 tsp salt to a boil. Add the carrot, cook for 30 seconds, then add the celery and cook for another 30 seconds. Drain, rinse with cold water, and add to the beans. Add the bell pepper to the beans.

To make the dressing, combine the zest, lime juice, vinegar, garlic, 1 tsp salt, and 1/4 tsp black pepper in a jar, and shake to combine (or whisk them together in a bowl). Add the olive oil, and shake again. Add the dressing and the jalapenos to the salad (the salad should be spicy, but if you're worried, add half the jalapeno, taste, and add more as desired).
Let the salad marinate for at least 30 minutes. Add the cilantro and mint before serving.
Serving Suggestions: Cotija (or Queso Fresco, or Mexican cheese) is pretty widely available these days, and pretty delicious sprinkled on top. Quick pickled onions could be good, and I know the orange-jicima salad is!
*Note: The original recipe calls for 1.5 cups (9oz) of dried black beans, sorted and soaked overnight. Drain and rinse the beans, put them in a large saucepan, cover with cold water, bring to a boil, and then cook at a gentle boil 20-25 minutes (until tender but not falling apart). When the beans are done, proceed with the recipe as written.
**Note: If you can find Champagne vinegar for cheap, that's fine. Otherwise, just use sherry vinegar.
Wednesday, June 6, 2012
Pita
Once summer starts in Davis (and it has, no matter what the calendar says), I become a permanent fixture of the porch. Breakfast turns into reading the news turns into work in the morning, then the late afternoon wanders in with a book (and quite possibly a beer). I like to eat late, when the sun has set, but it is not quite dark and still a little warm. I like to eat lightly, and ideally with my fingers, some bread and cheese and tomato, or a few salads with some warm pita.


The other weekend I was in a park, instead of parked on the porch. One of the local high schools was putting on a free, outdoor play ("The Compleat Works of Wllm Shkspr (Abridged)," the first half of which was hilariously bad, the second half was just hilarious - think Hamlet with only three actors, done forwards, fast forwards, and backwards in under five minutes), and the Professor and I met some friends there, to watch and have a picnic. I'm not sure if the things I brought were ideal finger foods, but they were certainly delicious, and would be perfect for a late supper on the porch. I will post the salads over the next few days, but start with some pita with your next rendition of your favorite salad.

Thursday, May 31, 2012
Some days.
Some days, you're done with a frigid office and four walls between you and the sound of, well, anything.

Some days, you're tired of your cannibalistic chickens.


Some days, you need a Franzi, Paul Simon, and a porch.

Cheers.
"F**k it. I'm gonna build a fetish costume for my chicken."
Serves one (or many, as needed).
Ingredients:
One (or many) Franziskaner Weissbier, cold
One porch, warm and spattered with sunlight
One Paul Simon album, preferably Graceland
Directions:
Sit on porch.
Pour beer into attractive glass of your choosing.
Start album.
Walk on.

Some days, you're tired of your cannibalistic chickens.


Some days, you need a Franzi, Paul Simon, and a porch.

Cheers.
"F**k it. I'm gonna build a fetish costume for my chicken."
Serves one (or many, as needed).
Ingredients:
One (or many) Franziskaner Weissbier, cold
One porch, warm and spattered with sunlight
One Paul Simon album, preferably Graceland
Directions:
Sit on porch.
Pour beer into attractive glass of your choosing.
Start album.
Walk on.
Wednesday, May 30, 2012
Ragout for You
I find that ice cream has been a tricky subject. Don't get me wrong - it has many things going for it, including being delicious and relatively easy to make (invest in an ice cream maker. Do it.). Unfortunately, I have not yet figured out a way to photograph a pot of liquid in a New and Exciting way. Plus, as we near the 100+ days of summer in Davis, photographing a bowl of ice cream becomes something like kitchen parkour. You have thirty seconds until soup. Go!

So, instead of blogging about ice cream, I wore the ice cream socks.


That done, meet the fava bean.


My relationship with said bean began a year or so ago, when I moved into the Owl House, and discovered a circular jungle in the back yard. The fava forest was Rainbow's doing, and her legacy lives on: a few beans from last year sprouted.

Of course, I had no idea what to do with these things.
When confronted with a new green thing to eat, I often turn to Chez Panisse Vegetables to get a feel for how to prepare it, what might be done with it, what flavors work well with it. The recipes tend to be simple (and generally delightful), which is exactly what I need when I'm getting to know a new vegetable. The recipe that caught my eye this time was for a fava bean ragout. I added the orzo to make it a light late spring meal.
Happy explorations!
Fava Bean Ragout with Orzo
Adapted from Chez Panisse Vegetables by Alice Waters
Serves 2 as a light meal
Ingredients
2 1b whole fava beans
1 large clove of garlic, peeled and chopped fine
1 small sprig of rosemary, leaves removed and chopped fine
Olive oil
Salt and pepper
1 tsp lemon juice
1/3 cup orzo
parmesan

Directions
First, start a pot of water for the orzo. When it boils, add the orzo, and cook 7-10 minutes, until al dente. When it's done, drain it and set it aside.
To prepare the fava beans, you shell the tough outer pod:

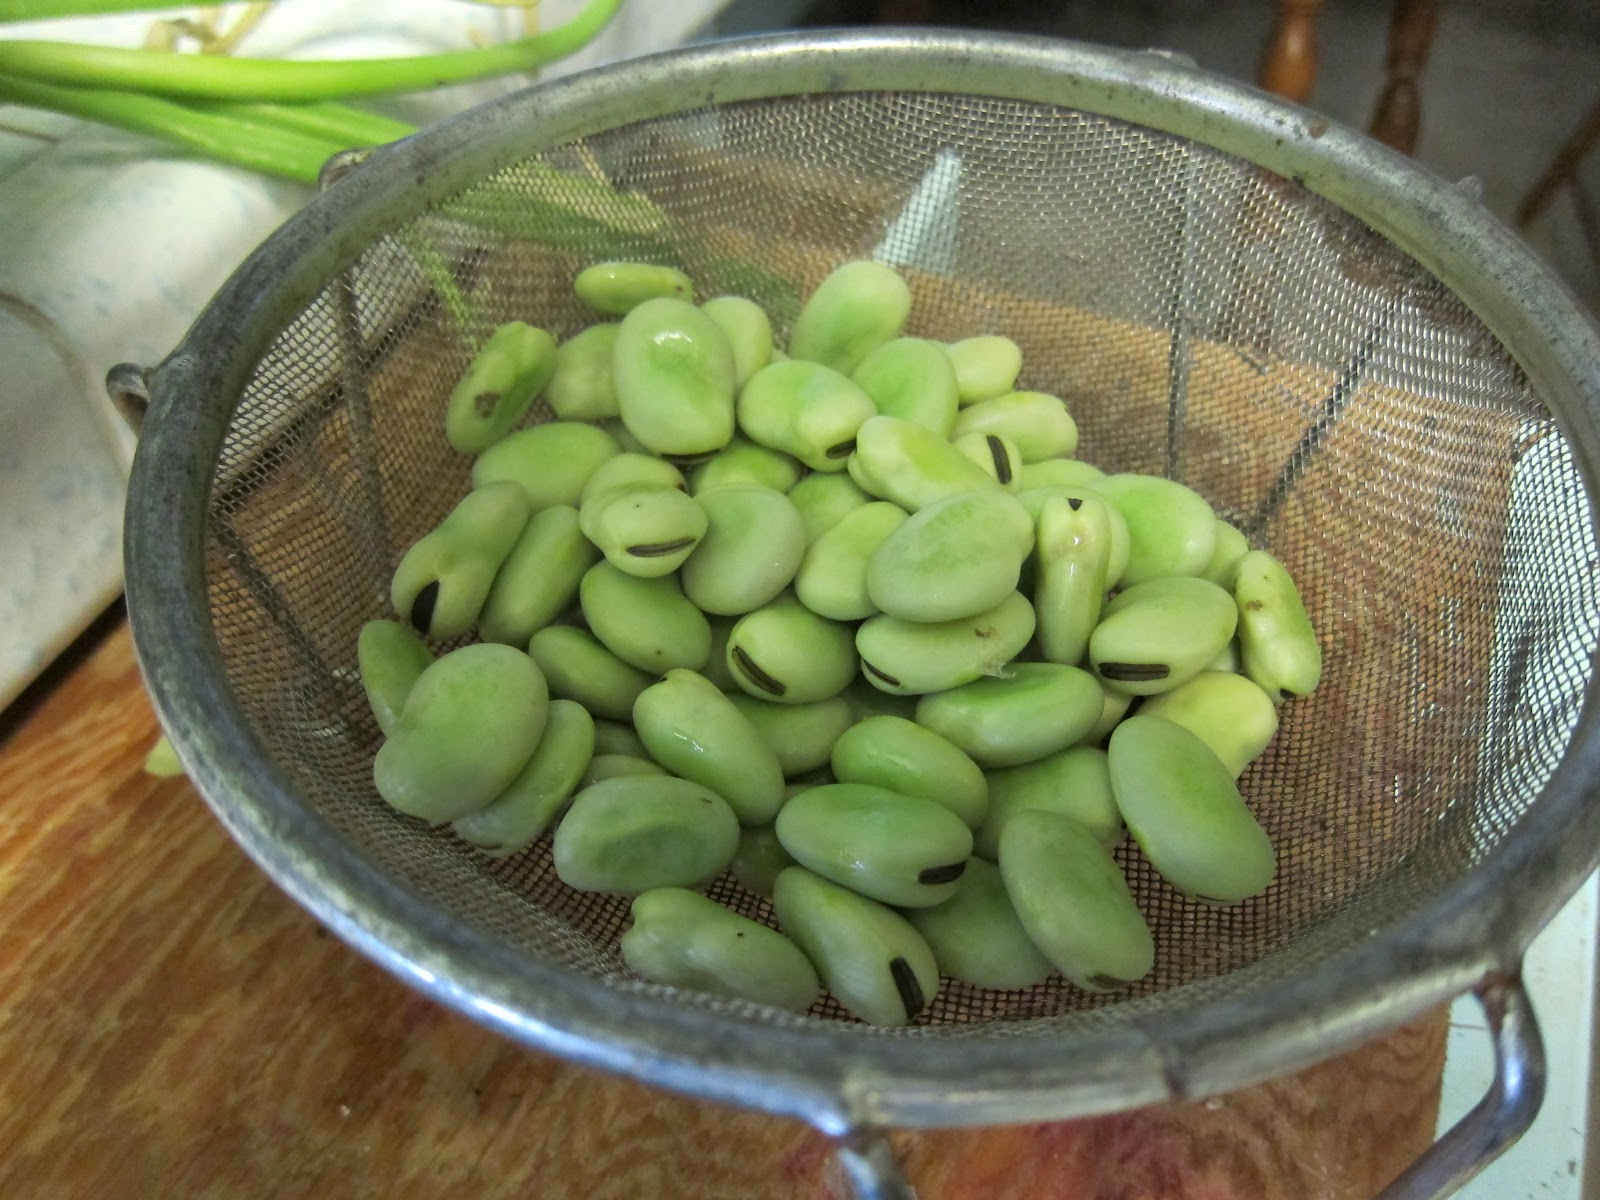
You'll be left with a pile of beans, which (secretly) have yet another skin that you'll remove by blanching the beans: bring a pot of water to a boil, add the favas, and simmer for a minute. Drain the beans,

then find the Professor to come help you peel them.

I found it worked best to break the skin by pinching it with a fingernail, then gently squeezing them out. You'll be left with a pile of bright green, totally naked favas. Put the beans in a deep, not too wide pot, and add olive oil and water in equal parts just to cover (I found I needed 1/3-1/2 cup of each). Add the finely chopped garlic and rosemary leaves, 1/4 teaspoon of salt (to start), and several good grinds of pepper. Bring the mixture to a simmer, cover the pan, and let simmer for 5 minutes - until the beans are tender. When the favas are ready, add the orzo and the lemon juice, and stir to combine. Taste for salt and pepper, and adjust as you like (careful with the salt - I like to serve it with parmesan, which is salty on its own).

Serve with grated parmesan on top. (Like I said.) We, um, at it all that night, but I bet it would be delicious cold as well.
When confronted with a new green thing to eat, I often turn to Chez Panisse Vegetables to get a feel for how to prepare it, what might be done with it, what flavors work well with it. The recipes tend to be simple (and generally delightful), which is exactly what I need when I'm getting to know a new vegetable. The recipe that caught my eye this time was for a fava bean ragout. I added the orzo to make it a light late spring meal.
Happy explorations!
Fava Bean Ragout with Orzo
Adapted from Chez Panisse Vegetables by Alice Waters
Serves 2 as a light meal
Ingredients
2 1b whole fava beans
1 large clove of garlic, peeled and chopped fine
1 small sprig of rosemary, leaves removed and chopped fine
Olive oil
Salt and pepper
1 tsp lemon juice
1/3 cup orzo
parmesan

Directions
First, start a pot of water for the orzo. When it boils, add the orzo, and cook 7-10 minutes, until al dente. When it's done, drain it and set it aside.
To prepare the fava beans, you shell the tough outer pod:

You'll be left with a pile of beans, which (secretly) have yet another skin that you'll remove by blanching the beans: bring a pot of water to a boil, add the favas, and simmer for a minute. Drain the beans,
then find the Professor to come help you peel them.

I found it worked best to break the skin by pinching it with a fingernail, then gently squeezing them out. You'll be left with a pile of bright green, totally naked favas. Put the beans in a deep, not too wide pot, and add olive oil and water in equal parts just to cover (I found I needed 1/3-1/2 cup of each). Add the finely chopped garlic and rosemary leaves, 1/4 teaspoon of salt (to start), and several good grinds of pepper. Bring the mixture to a simmer, cover the pan, and let simmer for 5 minutes - until the beans are tender. When the favas are ready, add the orzo and the lemon juice, and stir to combine. Taste for salt and pepper, and adjust as you like (careful with the salt - I like to serve it with parmesan, which is salty on its own).

Serve with grated parmesan on top. (Like I said.) We, um, at it all that night, but I bet it would be delicious cold as well.
Thursday, May 24, 2012
The Perfect Hard-Boiled Egg.
I wasn't even going to post until later this evening...but lunch happened.

See, I've been reading this book called "How to Read a French Fry," by Russ Parsons. It's a semi-scientific book (emphasis on semi), the goal of which seems to be to get you to understand why things work the way they do, for some subset of the large number of miracles that happen in kitchens every day.

The relevant chapter is on eggs. Though really, all you need is a sentence or two:
The Perfect Hard-Boiled Egg
Paraphrased from "How to Read a French Fry" by Russ Parsons
Directions:
Put egg in small pan and cover with water. Bring water to a boil, turn off heat, let water cool to warm (you could leave your hand in it indefinitely).
The result:


See, I've been reading this book called "How to Read a French Fry," by Russ Parsons. It's a semi-scientific book (emphasis on semi), the goal of which seems to be to get you to understand why things work the way they do, for some subset of the large number of miracles that happen in kitchens every day.

The relevant chapter is on eggs. Though really, all you need is a sentence or two:
The Perfect Hard-Boiled Egg
Paraphrased from "How to Read a French Fry" by Russ Parsons
Directions:
Put egg in small pan and cover with water. Bring water to a boil, turn off heat, let water cool to warm (you could leave your hand in it indefinitely).
The result:

Voila! Your perfect egg is done. No gray, no rubber, just delicious. What do you do with your hard-boiled eggs?

Thursday, May 17, 2012
How I eat.
The free food pile was threatening to overwhelm its corner. At the time of this recipe, it contained: 2 half-open bottles of red wine (Two Buck Chuck for the win(e)!), a bottle of Cointreau, a mostly-gone bottle of tequila (notice the cork floating), two prickly pears, two limes (jalapeno-prickly pear-lime margaritas were the order of the night), a clove of garlic, and this horrible attempt at hazelnut-white chocolate-rose macarons (the piece of paper is a warning sign to all potentially interested parties). (Since then, we've added several bottles of hot sauce, tamari almonds, hot dog buns, and some mate.) The tragedy of the commons at work.

Clearly, something had to be done. Fortunately, in addition to the dire state of The Corner, I had plans to attend the [Legendary] Anderson Valley Beer Festival. The solution was then obvious - what better way to prevent the beer from going to our heads than these:

I don't even have to tell you what these are, for they have been marked with the international symbol of the peanut butter cookie. This particular recipe was adapted from one of my favorite informational food blogs - the Joy of Baking.
When I took the pictures for this entry, I was thinking a lot about the banana bread post. I have a image in the middle of the post of a slice of banana bread on a plate on the table. I had just served it to David, and took a picture before it disappeared. I like the way it sits, slightly tumbled, onto the plate. It looks like food, it looks ready to be sampled, munched, gobbled...eaten.

That is how I serve food, and I much prefer that photo to the one I have at the end of the post. It is true that I like a tablecloth and I like beautiful plates and I like elegant utensils...but I don't go a lot further than that.
I don't actually tie a scrap of purple cloth around my fork and eat banana bread on a lace doily.
I do, however, eat peanut butter cookies from a glass plate in the sunshine. And I do drink milk out of mason jars. Maybe you do, too.


Clearly, something had to be done. Fortunately, in addition to the dire state of The Corner, I had plans to attend the [Legendary] Anderson Valley Beer Festival. The solution was then obvious - what better way to prevent the beer from going to our heads than these:

I don't even have to tell you what these are, for they have been marked with the international symbol of the peanut butter cookie. This particular recipe was adapted from one of my favorite informational food blogs - the Joy of Baking.
When I took the pictures for this entry, I was thinking a lot about the banana bread post. I have a image in the middle of the post of a slice of banana bread on a plate on the table. I had just served it to David, and took a picture before it disappeared. I like the way it sits, slightly tumbled, onto the plate. It looks like food, it looks ready to be sampled, munched, gobbled...eaten.

That is how I serve food, and I much prefer that photo to the one I have at the end of the post. It is true that I like a tablecloth and I like beautiful plates and I like elegant utensils...but I don't go a lot further than that.
I don't actually tie a scrap of purple cloth around my fork and eat banana bread on a lace doily.
I do, however, eat peanut butter cookies from a glass plate in the sunshine. And I do drink milk out of mason jars. Maybe you do, too.

Subscribe to:
Posts (Atom)